
Create a project
Step-by-step guide to creating a project.
- Click
 Projects on the left-hand side navigation pane.
 - Click the
 New project button.
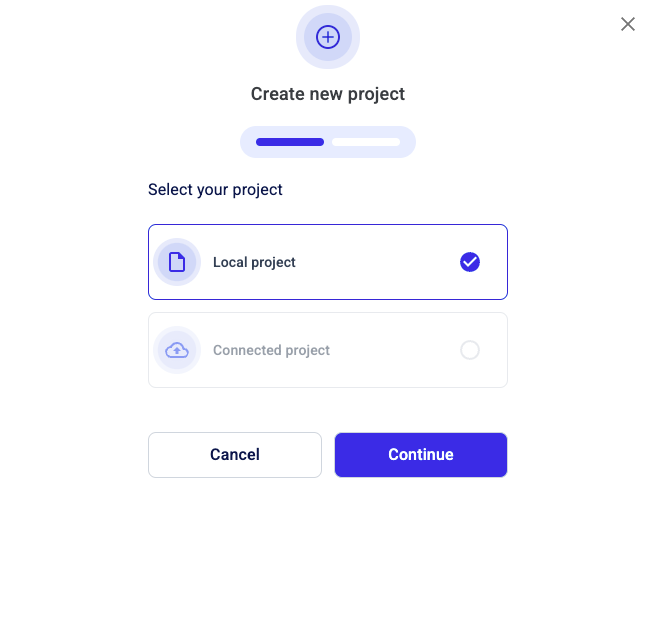
 - In the Create new project screen, select the type of project you want to create:
- Local project: To store all resulted data locally.
- Connected project: To store all resulted data on a location available in a network/online (available soon).
When finished, click Continue.
- In the next step, fill in the project details:
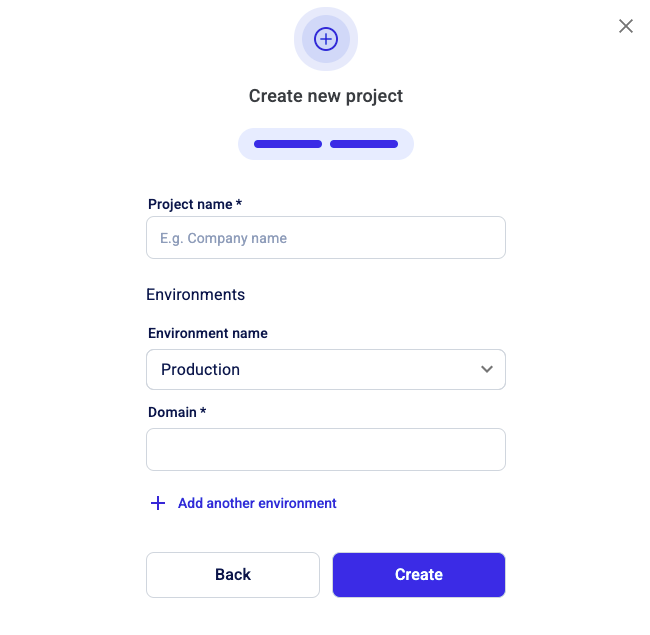
- Project name (mandatory): Give your project a meaningful name.
- Environments: Select the desired environment from the list.
Environments refer to entities/sections of the website that you can choose to include in the scan separately from the main web page (for example, a website instance running in a staging environment, or partners.domain.com). Visit this page to find out more about Environments.
- Domain (mandatory): Type the domain you want to audit (in any format you want - for example,
domain.com,www.domain.com,https://domain.com,https://www.domain.com). - + Add another environment: Click to add more environments (if this is the case, you need to complete the corresponding name and the domain of the newly-added environment).
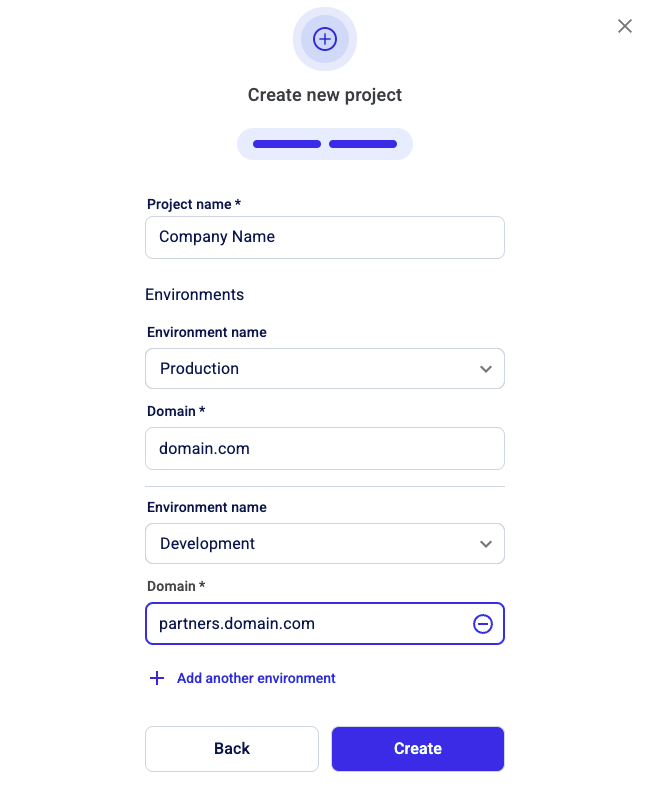
When finished, click Create.
At this stage, Accessibility Tools connects to the website you specified and either accesses its existing sitemap or creates one.
Once the project is created, the Start test wizard is triggered.